background

Monday, November 21, 2011

Matchy Matchy

I just love when things are matchy matchy.  I used to go to church with a mom who had two girls, and they all had dresses made with the same fabric.  I thought it was so cute.  And I absolutely adore the idea of a girl matching her dolly. 

I got some hand-me-down fabric from my grandma years ago that is so cute, and I finally used it a couple of months ago on a simple A-line skirt for my little girl.  Then I found a pattern for a doll dress that was perfect.  Since I used a pattern, I figured there was no need for a pictorial.  That's what the pattern is for, right?  But I did want to share a picture of it because it turned out so cute, and of course Audrey loves it so much.  I had planned on giving it to her as a Christmas present, but I was so excited, I couldn't wait.


And yes, that is a Cabbage Patch Doll from the 90's.  I'm a little nostalgic, and I kept a lot of my old things for my kids.  Want to see my old Ninja Turtles too?

Glitter Shoes

Update: Ok , so she's used them for a little while now, and the glitter is starting to come off where the shoe bends naturally.  :(  I wonder if there is a better glue to use for this kind of project.  It sort of cracked and fell of.  It's not really noticeable yet, but she will only be able to wear them a couple more times.

Have you ever bought some of those glitter shoes for your little girl, and a week later half of the glitter has come off??  They are super cute, but some of them are made a little better than others.  We got some silver ones from The Children's Place, and boy were they cheap (poorly made, not inexpensive)!  Here is my little girl's shoe all ready to go in the trash:


I figured, I'm ready to throw these away anyway, I might as well try to save them first.  So, I busted out the glitter and the glue.


First I sanded the shoes a little, to get any of the loose glitter off.  Then I just took some tacky craft glue and spread it all over the shoe.


Then I put glitter all over the shoe.  I couldn't decide what color to use, so there is some pink, blue and green in there.  Shake off the excess glitter, then  let it dry for a few hours.


Next, I used modge podge and covered the glitter completely.  I also cut some fabric to cover the inside of the shoe because these actually have had a lot of use.  I let it dry over night and then covered it in modge podge again.  Then I put on an extra layer over the toes and other places where there was a lot of wear.


And here they are!  Fabulous, right??  I will have to let her wear them for a couple of weeks and update to let you know how well they hold up.  At least she will get a little more use out of them.  This will probably work on any canvas shoe too, if you want to glam up a tennis shoe or something.  In fact, I might just try that too!


Saturday, November 12, 2011

My son is singing in a "Barnyard Moosical" for school on Monday, and has been asked to dress like a cow.  Now, I'm not about to go spend money on a cow costume that he's going to wear once, so I went to look in my craft closet to see what I had.  I found this shirt that James stained last year and isn't really wearable.  Luckily, I could never bring myself to throw it away.  I thought for sure I could think of a way to use it for something, and I was right!  Yay me!  So, I grabbed the shirt, a sharpie, some cardboard, tole paint, and a paint brush.


I stuck the cardboard inside the shirt, and drew some spots with my sharpie.


Then I filled in the spots with the black paint.  Yes, I know that's not the purpose of this paint, but it's what I had on hand, and it works!


I let it dry a few hours, then flipped it over and spotted the back.


Throw in a pair of black gloves for the hooves, and there you have it: A free cow costume that was really easy to make! 

Disclaimer:  The paint is really stiff, and it will be uncomfortable, so he will have to wear an undershirt with it.  If you are going to plan on doing this a fabric paint would probably be a lot better.


Update:  Here is a picture at the performance.  I didn't sit close enough to get a good picture during the singing, but this is him in his classroom.  What a cutie!


Mini Pumpkin Soaps


 This week I joined a group called MOPS, and we did a fun quick craft making balls of soap.  I thought it would be something my kids would really like doing, so I tweaked it a little to make it more interesting. Since we are having company for thanksgiving this year, I decided we would make some cute fall-themed soaps to display in the bathroom.

 Supplies:  Ivory soap, food coloring. cheese grater, sandwich bags, water, and waxed paper.


Grate the ivory soap using the really fine side.  We tried it with the larger size, and it was harder to mix the color in to. (There's a picture of that attempt later).


 Put a small amount into one of the sandwich bags to color green for the stems, then divide the rest into three separate sandwich bags.  Add a drop of food coloring and just enough water to moisten the soap.  Close the bag really well!


Mix the soap, water and food coloring until it is all incorporated.


Turn the orange soap out on to waxed paper and roll into a pumpkin shape.  This part is going to be really messy!!!


Shape the green soap into stems, vines, and leaves if you want, and add them to the pumpkins.


The kids had so much fun doing this!  We will definitely be doing it again.  Here's a picture of our first attempt.  We used the larger side of the grater, and you can see that the color didn't go all the way through the soap.  We had some cookie cutters, so we rolled the soap out and cut out some cute shapes.  This was a blast too!

Friday, November 11, 2011

No Sew Fleece Scarf


I've got some really cute fleece left over from other projects, and I thought they would make some good scarves.  These are so easy to make.  No sewing needed!  This one is a present from the kids to their Aunt Theresa for Christmas.

To start, you need some fleece, scissors, rotary cutter and mat, and a ruler:


And, if available, some really cool kids to help out:


Now that you have your supplies, cut 8 inches accross the width of your fabric with the rotary cutter.


Take some scissors, and cut several times about a third of an inch wide and 2 inches long to make fringe along the ends.  I put my ruler two inches up on the fabric as a guide so the kids would know where to stop.

Tip:  If you are a serious seamstress, you will have a pair of sewing scissors that never touch anything but fabric.  Do not cut fleece with these scissors because it will dull them really fast.  I learned this when I cut fabric at JoAnn.


If you really do have your kids cut it, it will look something like this:


Now, take the strands, pull firmly, and let them snap back.  This will curl the fringe.


The kids had fun with this part, even though it doesn't really look like it in this picture.


The fringe will look something like this:


And the final product!  Told you it was easy!

Wednesday, October 19, 2011

Tooth Pillow

My six year old boy finally has his first loose tooth!  He found out because his new friend wanted to play, "a weird game called dentist."  But that is another story.  Since I usually make girly things that he's not interested in, he's been asking me to make something for him.  He wants a race car.  I told him I can't sew a race car.  So, I'm hoping he'll be happy with a little monster tooth pillow.

Supplies:
Fuzzy or furry fabric for the body.  Fleece will work.
White felt for eye and tooth
Black felt for the center of the eye
White, black, and blue thread (or whatever color your body is)
Contrasting fabric for horns
Stuffing
If you want to do things right, you should use some interfacing, but I generally just use what I have for these kinds of things.  I do not usually have interfacing.  My son will not know the difference.

If I had some forethought, I would have made a template that I could have printed off, but I usually do things off the cuff.  Here are the pieces:
1 white oval eye
1 white triangle tooth
1 black pupil
4 horns (alternate between orientation)
4 feet
2 large oblongs shapes for body


First sew the pupil to the eye and finish the top edge of the tooth.


Pin the eye and tooth to the front body piece and sew together, leave a pocket at the top of the tooth.  Then sew a line for the rest of the mouth.


Sew the horns and feet together, right sides together, leaving the end that will not show open.  Cut excess from the tip of the horn.  Turn right side out and stuff.  Pin with the open edges lined up with the raw edge of the face.

Pin the front piece with the back piece, right sides together, with the horns and feet inside.  Sew together, leave a hole on the side to turn right side out.

Stuff him and sew up the hole in the side. Place a tooth in the tooth pocket, and the Tooth Fairy will replace it with some cash!


Friday, October 14, 2011

FHE Chart


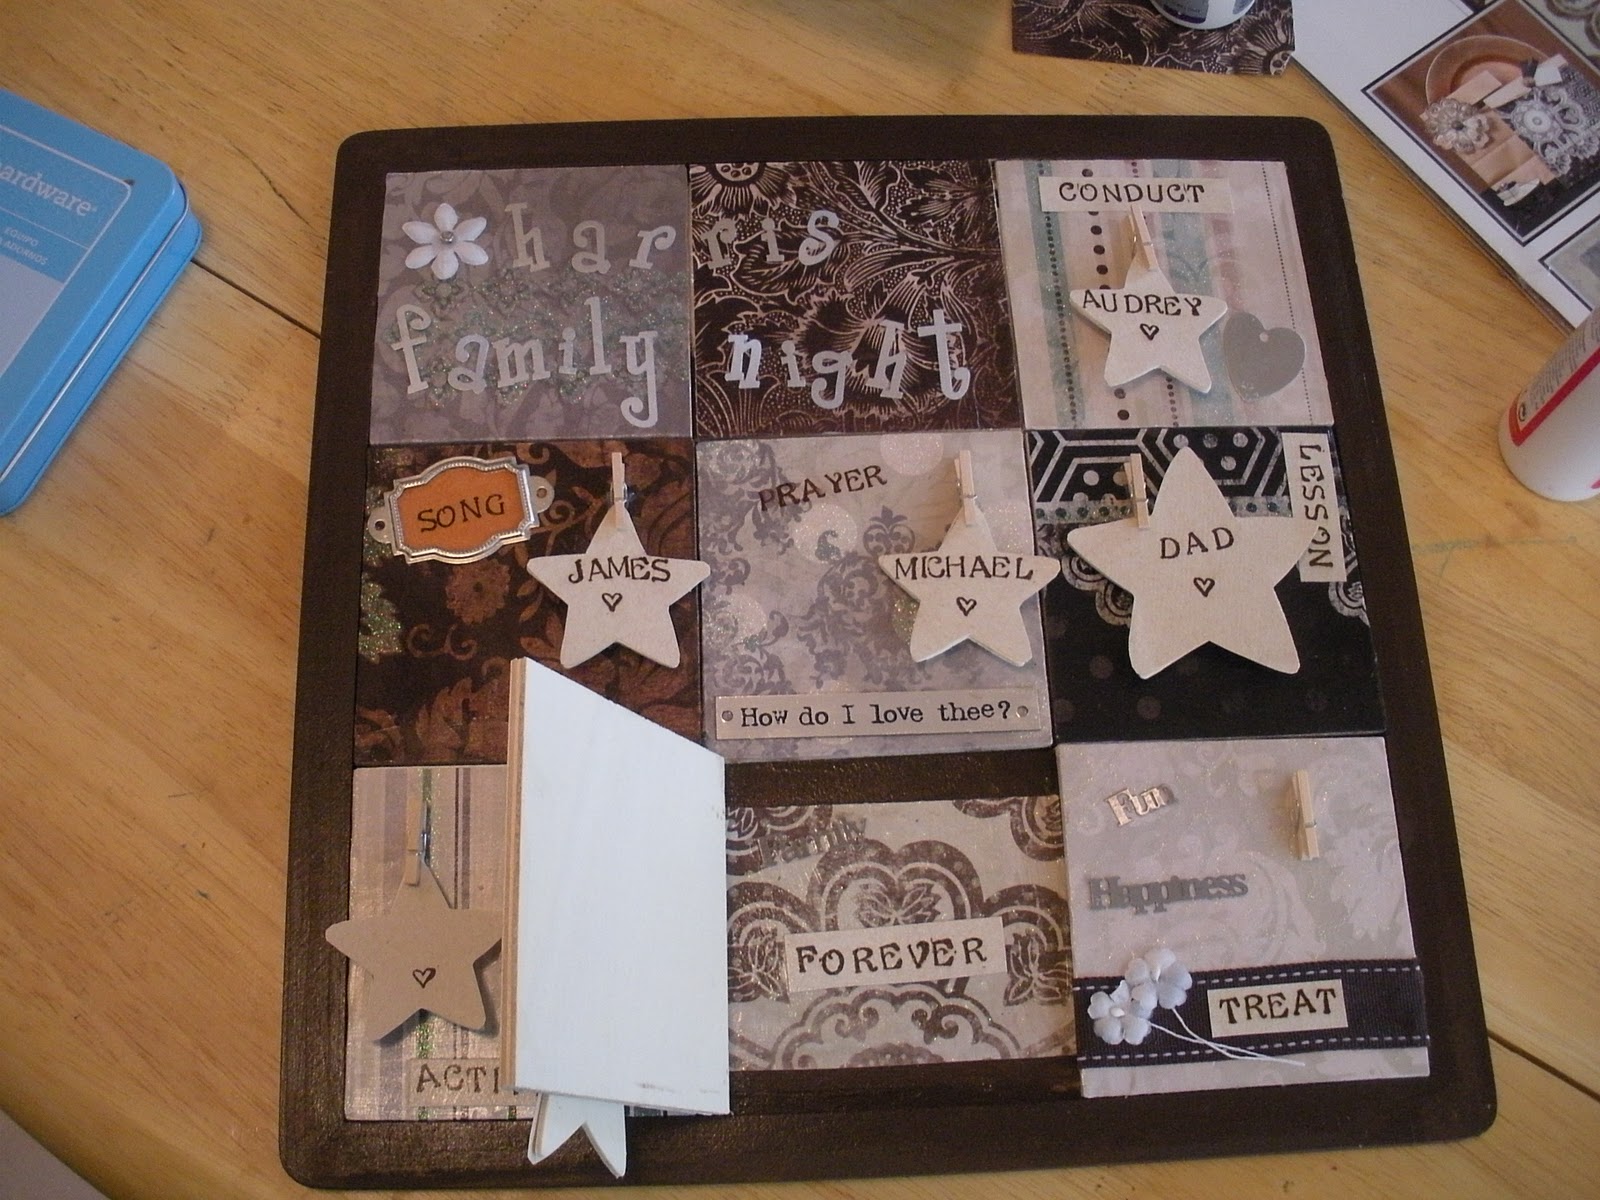
I made a family home evening chart years ago with cute little paper flowers and flower pots.  The pots had our names, and the flowers had the job we had for that night.  It worked, and even though I only had one baby at the time, I made it so we could at another pot.  The chart became obsolete when we had baby number three, and even after almost three years, I hadn't made a new one.  The kids started fighting over who was the "ductor", and since family night is not about fighting, we figured it was time for a new chart.  I had a few ideas in mind when I went shopping for supplies, but then I saw this:


and I changed all my plans.  I wanted pegs, but couldn't find any (serves me right for shopping for crafts at Wal-Mart).  So, I found some cute mini clothes pins to use to hold the names in place.  I kind of like them better anyway.   

Supplies:  Wooden Background    
                Stars (or other shape) for the names
                Modge podge                 
                Paper for backgrounds (I used 10, 1 for the stars, and 9 for the squares)
                Tole Paint and finish              
                Stamps or sticker letters (unless you have really good handwriting)
                Mini Clothes Pins or pegs
                Embellishments
                Glue Gun


First, sand the wood if it needs it.  Paint and finish the background  I ended up painting the inside as well because you can see it ever so slightly between the tiles.


Then, I cut the papers to size attached the embellishments to the papers and modge podged the papers to the tiles.  Once dry, I used a glue gun to attach the mini clothes pins to the squares and the hinge on the bottom left and middle squares.


After everything was glued and dry, I glued the squares in to place.  Then I took one of my papers, cut it to the size of the stars, stamped our names on and modge podged those on to the wood stars.


 I thought it would be fun to make the hinge function so, surprise, there's a hidden door!  It's kind of hard to see in this photo,  but it says "Family Forever" on the inside.  My little girl especially likes this little door.


If you have a question about what Family Home Evening is click here.  It has a short explanation, as well as links for ideas and activities.  I also saw this turned in to a cute message board.  I just love how you can do anything with a little paper and glue!

Thursday, October 13, 2011

Burp Cloths


Don't you think Raggedy Ann and Andy make just about the cutest kids fabric??  I do, and I have for years.  Before I was even married, I bought a ton of this flannel and a little terry cloth that matched, thinking I could use it when I had kids.  I did use it a few years later when my husband and I our first baby.  He made the crib and changing table, and I made the blanket, bumpers, and the baby.  I still have a ton left, and it's just been sitting there for years.  So, I busted it out a few weeks ago, and made some burp cloths. Here's how I made them:

First cut out the flannel and terry cloth to the size you want it.  I only had a little bit of terry cloth and I wanted to make a few, so I made mine 14x9 inches.  With how much my boys spit up and my little girl drooled, I would definitely make them bigger if I had more fabric.
  

I wanted to try the rounded edge look, so I used a cd, and cut the edges with a rotary cutter.  After it's cut, place the fabric wrong sides together and pin into place.  I am not a fan of pinning. In fact, I think it's the worst part of sewing, so I can tell you how important it is because of all the unpicking I have done.


Now, sew the two pieces together at about 5/8 inch, leaving a gap at one end to turn it right side out.


Then, cut little triangles in to the rounded edge to reduce the bulk.


Turn right side out and take the something like the blunt end of your scissors, or maybe a popsicle stick along the edges to push them out where they need to be.  Top stitch, once right around the edge, and once 1/4 inch in from the edge.  Be careful to close the opening you left while you were sewing them together.


And, it's finished!